It Started with a Small LCD Screen
January 2026. I wanted a small LCD display for my desk. An ESP32 with a 172×320 resolution screen. What should I show on it?
While coding with Claude Code, it hit me: “What if I could show what the AI is doing right now on this screen?”
I couldn’t keep staring at the terminal window, and I never knew when tasks would finish. So I started — building a monitor that shows at a glance what the AI coding assistant is doing.
Phase 1: ESP32 Prototype (January 24)
I started development before the ESP32 device arrived. Initially called “Claude Code Status Display.” The code is now available in the vibemon-app repository. The goal was simple:
Claude in thinking state → Show "Thinking..." on screen
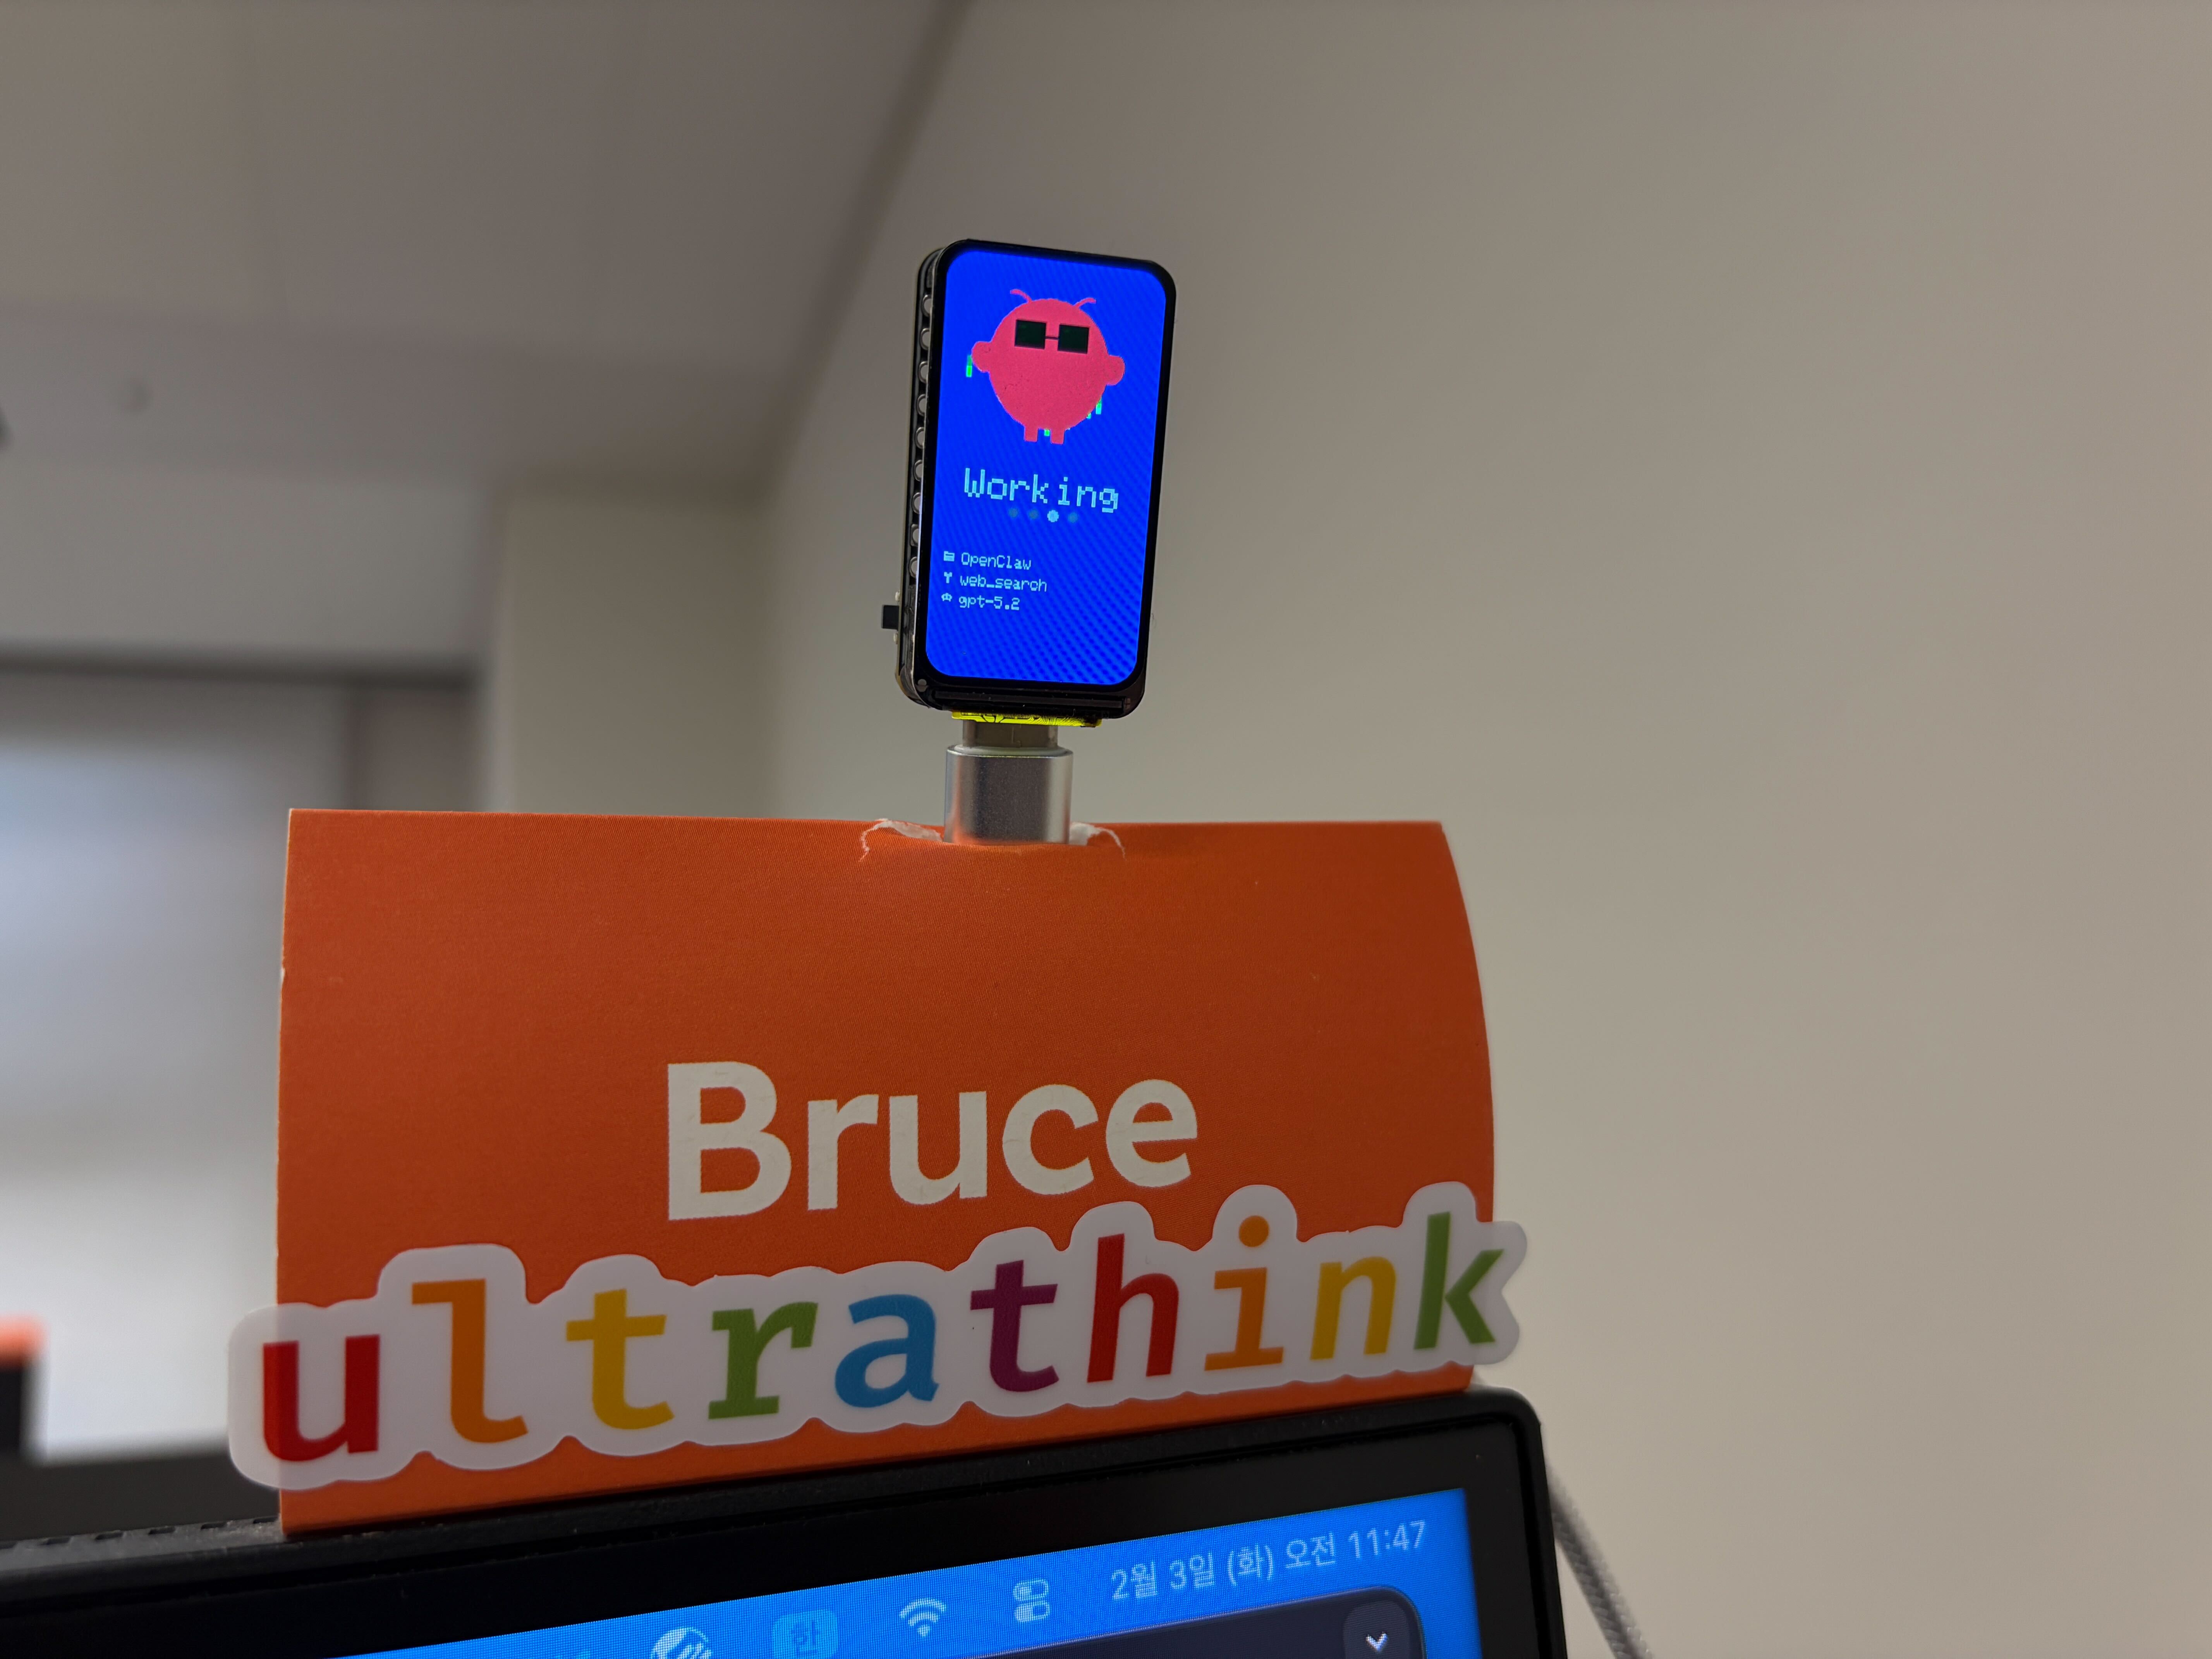
Claude in working state → Show "Working..." on screen
But just showing text would be boring, right? So I added pixel art characters.
Starting with eye shapes, I created expressions for each state:
- idle state: ■ ■ (default eyes)
- thinking state: ▀ ▀ + 💭 (thought bubble)
- working state: 🕶️ (sunglasses - Matrix style!)
- notification state: ● ● + ? (question mark)
- done state: > < (satisfied eyes)
Phase 2: Simulator and Desktop App (January 24 - February 1)
I needed a way to test before the ESP32 arrived. So I built a web simulator first. To preview the ESP32 screen in a browser.
While waiting, I also built a Desktop App. This Electron app became an alternative for those without ESP32 hardware.
Features were rapidly added:
| Feature | Description |
|---|---|
| Always on Top | Always displayed above other windows |
| System Tray | Quick control from menu bar |
| Frameless Window | Clean floating design |
| Floating Animation | Gentle bobbing effect |
And integration with Claude Code hooks! Status automatically sent to the app whenever Claude Code changes state.
# Send status via Claude Code hooks
curl -X POST http://127.0.0.1:19280/status \
  -H "Content-Type: application/json" \
  -d '{"state":"working","tool":"Bash","project":"my-project"}'
Evolution of Connection Methods
The way Claude Code and VibeMon connect kept evolving.
Stage 1: Local HTTP
Started simple. Direct transmission from Claude Code hooks to Desktop App.
curl -X POST http://127.0.0.1:19280/status \
  -d '{"state":"working"}'
Stage 2: USB Serial
The ESP32 arrived! ESP32-C6-LCD-1.47 board — a cute device with a small 172×320 resolution LCD.
It was my first time using Arduino, but AI made it easy. Asked Claude Code and got a guide instantly.
Arduino IDE Setup:
1. Install Arduino IDE
2. Add ESP32 board manager (Preferences → Additional Board URLs)
   https://espressif.github.io/arduino-esp32/package_esp32_index.json
3. Select board: ESP32C6 Dev Module
4. Partition scheme: Huge APP (3MB No OTA/1MB SPIFFS)  ← Required for SSL!
Required Libraries:
| Library | Purpose |
|---|---|
| LovyanGFX | TFT display control (ESP32-C6 compatible) |
| ArduinoJson | JSON parsing |
| WebSockets | WebSocket client |
Build and upload! Connect via USB cable and status transmits via serial communication.
Stage 3: Internal Network HTTP
ESP32 connects to WiFi and runs a web server anyway, right? Just send via HTTP on the same network without USB cable.
curl -X POST http://192.168.1.xxx/status \
  -d '{"state":"working"}'
Stage 4: Cloud WebSocket
Supporting OpenClaw made me ambitious. I wanted to see the status of all AI agents from home and office on one screen.
So I registered the vibemon.io domain and built a web dashboard with WebSocket server. Now I can monitor in real-time from anywhere.
OpenClaw could install VibeMon via a plugin system. Unlike Claude Code’s hooks, OpenClaw uses a plugin system to add extensions. Eventually, I made OpenClaw install it by itself too — a meta situation where the AI installs and configures the plugin.
Hidden Challenge: model and memory
Claude Code hooks provide state, tool, project information, but model and memory information isn’t directly available.
Wouldn’t it be much more useful to see this on screen? Which model is being used, how much context window is consumed.
The solution was statusline. Claude Code’s statusline shows model and memory information. So I created statusline.py:
- Parse model, memory info from statusline
- Save to cache file per project (
~/.claude/vibemon/{project}.json) - Hook reads from cache and sends data together
# statusline.py - Save model/memory info to cache
cache = {
    "model": "Opus 4.5",
    "memory": 45
}
# hook - Read from cache and send
status = {
    "state": "working",
    "tool": "Bash",
    "project": "vibemon",
    "model": cache["model"],    # Value from statusline
    "memory": cache["memory"]   # Value from statusline
}
This way, two scripts cooperate to send complete status information.
On the other hand, Kiro had no way to get model and memory information at all. No statusline-like feature, and hook-provided information is limited. So the Kiro character only shows state, tool, and project. Unfortunate, but unavoidable.
Phase 3: Multi-Project Support (Late January)
What about working on multiple projects simultaneously? → Multi-window mode was born!
Each project gets its own window, with active projects on the right and inactive on the left, auto-arranged. Supports up to 5 windows.
Phase 4: Web Dashboard (February 1)
Using only locally felt limiting. I wanted to see AI agent status from multiple locations in one place. So the vibemon web dashboard project started!
Tech Stack
- Frontend: Next.js 16 + React 19 + TypeScript
- Database: AWS DynamoDB (Single Table Design)
- Real-time: WebSocket
- Infrastructure: Terraform (API Gateway, Lambda)
- Hosting: AWS Amplify
Architecture
┌─────────────────────────────────────────────────────────────────────────────┐
│                           VibeMon Architecture                              │
├─────────────────────────────────────────────────────────────────────────────┤
│                                                                             │
│  ┌─────────────┐    ┌─────────────┐    ┌─────────────┐                      │
│  │ Claude Code │    │    Kiro     │    │  OpenClaw   │                      │
│  │   (clawd)   │    │   (kiro)    │    │   (claw)    │                      │
│  └──────┬──────┘    └──────┬──────┘    └──────┬──────┘                      │
│         │                  │                  │                             │
│         │   Hooks          │   Hooks          │                             │
│         └──────────────────┼──────────────────┘                             │
│                            ▼                                                │
│  ┌─────────────────────────────────────────────────────────────────────┐    │
│  │                      AWS Amplify (Hosting)                          │    │
│  │  ┌───────────────────────────────────────────────────────────────┐  │    │
│  │  │              Next.js 16 + React 19 + TypeScript               │  │    │
│  │  │  ┌─────────────────────┐    ┌─────────────────────────────┐   │  │    │
│  │  │  │   POST /api/status  │    │   GET /api/statuses,metrics │   │  │    │
│  │  │  │  (Bearer Token Auth)│    │                             │   │  │    │
│  │  │  └──────────┬──────────┘    └──────────────┬──────────────┘   │  │    │
│  │  └─────────────┼──────────────────────────────┼──────────────────┘  │    │
│  └────────────────┼──────────────────────────────┼─────────────────────┘    │
│                   │                              │                          │
│                   ▼                              ▼                          │
│  ┌────────────────────────────────────────────────────────────────────┐     │
│  │                    DynamoDB (Single Table Design)                  │     │
│  │  ┌──────────────────┐  ┌──────────────────┐  ┌──────────────────┐  │     │
│  │  │  Token Profile   │  │  Agent Status    │  │    Metrics       │  │     │
│  │  │  (TTL: 24h)      │  │  (TTL: 30m)      │  │  (TTL: 24h~90d)  │  │     │
│  │  └──────────────────┘  └──────────────────┘  └──────────────────┘  │     │
│  └────────────────────────────────┬───────────────────────────────────┘     │
│                                   │                                         │
│         ┌─────────────────────────┼─────────────────────────┐               │
│         ▼                         ▼                         ▼               │
│  ┌─────────────────┐    ┌─────────────────────┐    ┌─────────────────┐      │
│  │   EventBridge   │    │ API Gateway         │    │   CloudWatch    │      │
│  │  ┌───────────┐  │    │   WebSocket         │    │      Logs       │      │
│  │  │ 1min rule │  │    │  ┌─────────────┐    │    │                 │      │
│  │  │ 15min rule│  │    │  │ $connect    │    │    │  STATUS_UPDATE  │      │
│  │  └─────┬─────┘  │    │  │ $disconnect │    │    │     events      │      │
│  └────────┼────────┘    │  └──────┬──────┘    │    └────────┬────────┘      │
│           │             └─────────┼───────────┘             │               │
│           ▼                       ▼                         ▼               │
│  ┌────────────────────────────────────────────────────────────────────┐     │
│  │                         Lambda Functions                           │     │
│  │  ┌────────────┐  ┌────────────┐  ┌──────────────┐  ┌────────────┐  │     │
│  │  │  Connect   │  │ Disconnect │  │    State     │  │  Metrics   │  │     │
│  │  │  Handler   │  │  Handler   │  │  Transition  │  │ Aggregator │  │     │
│  │  └────────────┘  └────────────┘  └──────────────┘  └────────────┘  │     │
│  └────────────────────────────────────────────────────────────────────┘     │
│                                   │                                         │
│                           WebSocket Broadcast                               │
│                    (API Gateway Management API)                             │
│                                   │                                         │
│         ┌─────────────────────────┼─────────────────────────┐               │
│         ▼                         ▼                         ▼               │
│  ┌─────────────┐          ┌─────────────┐          ┌─────────────┐          │
│  │   Desktop   │          │     Web     │          │    ESP32    │          │
│  │     App     │          │  Dashboard  │          │  Hardware   │          │
│  └─────────────┘          └─────────────┘          └─────────────┘          │
│                                                                             │
└─────────────────────────────────────────────────────────────────────────────┘
Key Components:
- Amplify: Next.js app hosting with auto build/deploy
- DynamoDB: Single table design for tokens, statuses, and metrics
- API Gateway WebSocket: Real-time bidirectional communication
- Lambda: Connection management, auto state transition, metrics collection
- EventBridge: 1min/15min scheduled Lambda triggers
- CloudWatch Logs: Status event logging, metrics query source
Token-based authentication so each user sees only their projects. Tokens auto-register on first use and expire after 24 hours.
Phase 5: Character Expansion (Early February)
Why support only Claude Code? Let’s support other AI assistants too!
| Character | Color | Target |
|---|---|---|
| clawd | Orange | Claude Code |
| kiro | White | AWS Kiro |
| claw | Red | OpenClaw |


Pixel art characters are based on each AI agent’s official character images. Added state-specific expressions — blinking eyes, sunglasses, sleeping eyes, thought bubbles, etc. Rendered as 128x128 PNG images, with characters automatically selected based on hook events.
Phase 6: Project Unification (February 5)
Didn’t like the name “vibe-monitor.” Unified to VibeMon for cleaner branding!
Phase 7: Let AI Install Itself
Wanted to automate the installation process. But then I thought, why not just have the AI do it?
Created an installation guide as a markdown file, and just tell the AI:
Read https://vibemon.io/setup.md and follow the instructions to join VibeMon
Claude Code reads setup.md, configures hooks, generates tokens, and tests everything. Meta.
VibeMon by the Numbers
| Item | vibemon-app | vibemon |
|---|---|---|
| Start date | 2026-01-24 | 2026-02-01 |
| Total commits | 518 | 101 |
| Development period | 12 days | 4 days |
619 commits, 16 days of development. Most of it coded with AI.
Special Features
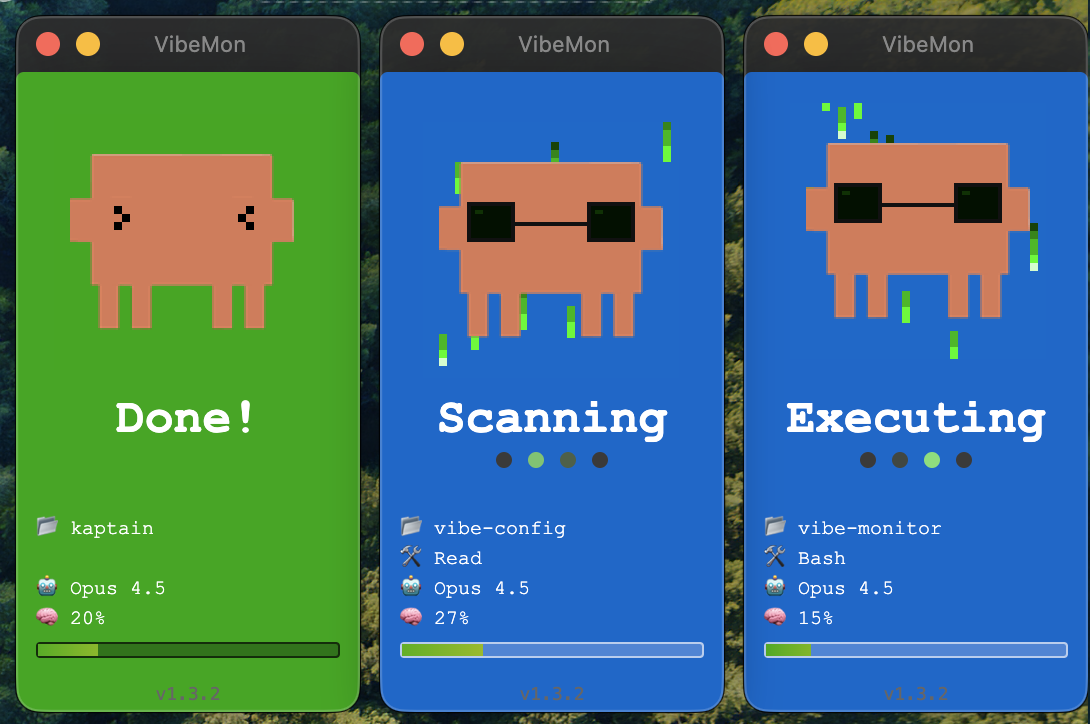
1. State-based Animations
| State | Background | Eye Type | Text | Trigger |
|---|---|---|---|---|
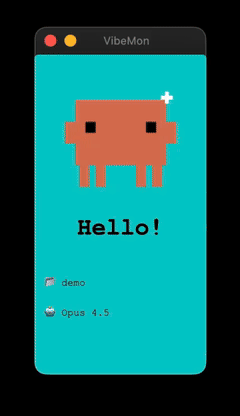
| start | Cyan | ■ ■ + ✦ | Hello! | Session starts |
| idle | Green | ■ ■ (blinking) | Ready | Waiting for input |
| thinking | Purple | ▀ ▀ + 💭 | Thinking | Prompt submitted |
| planning | Teal | ▀ ▀ + 💭 | Planning | Plan mode active |
| working | Blue | 🕶️ (sunglasses) | (tool-based) | Tool executing |
| packing | Gray | ▀ ▀ + 💭 | Packing | Context compacting |
| notification | Yellow | ● ● + ? | Input? | User input needed |
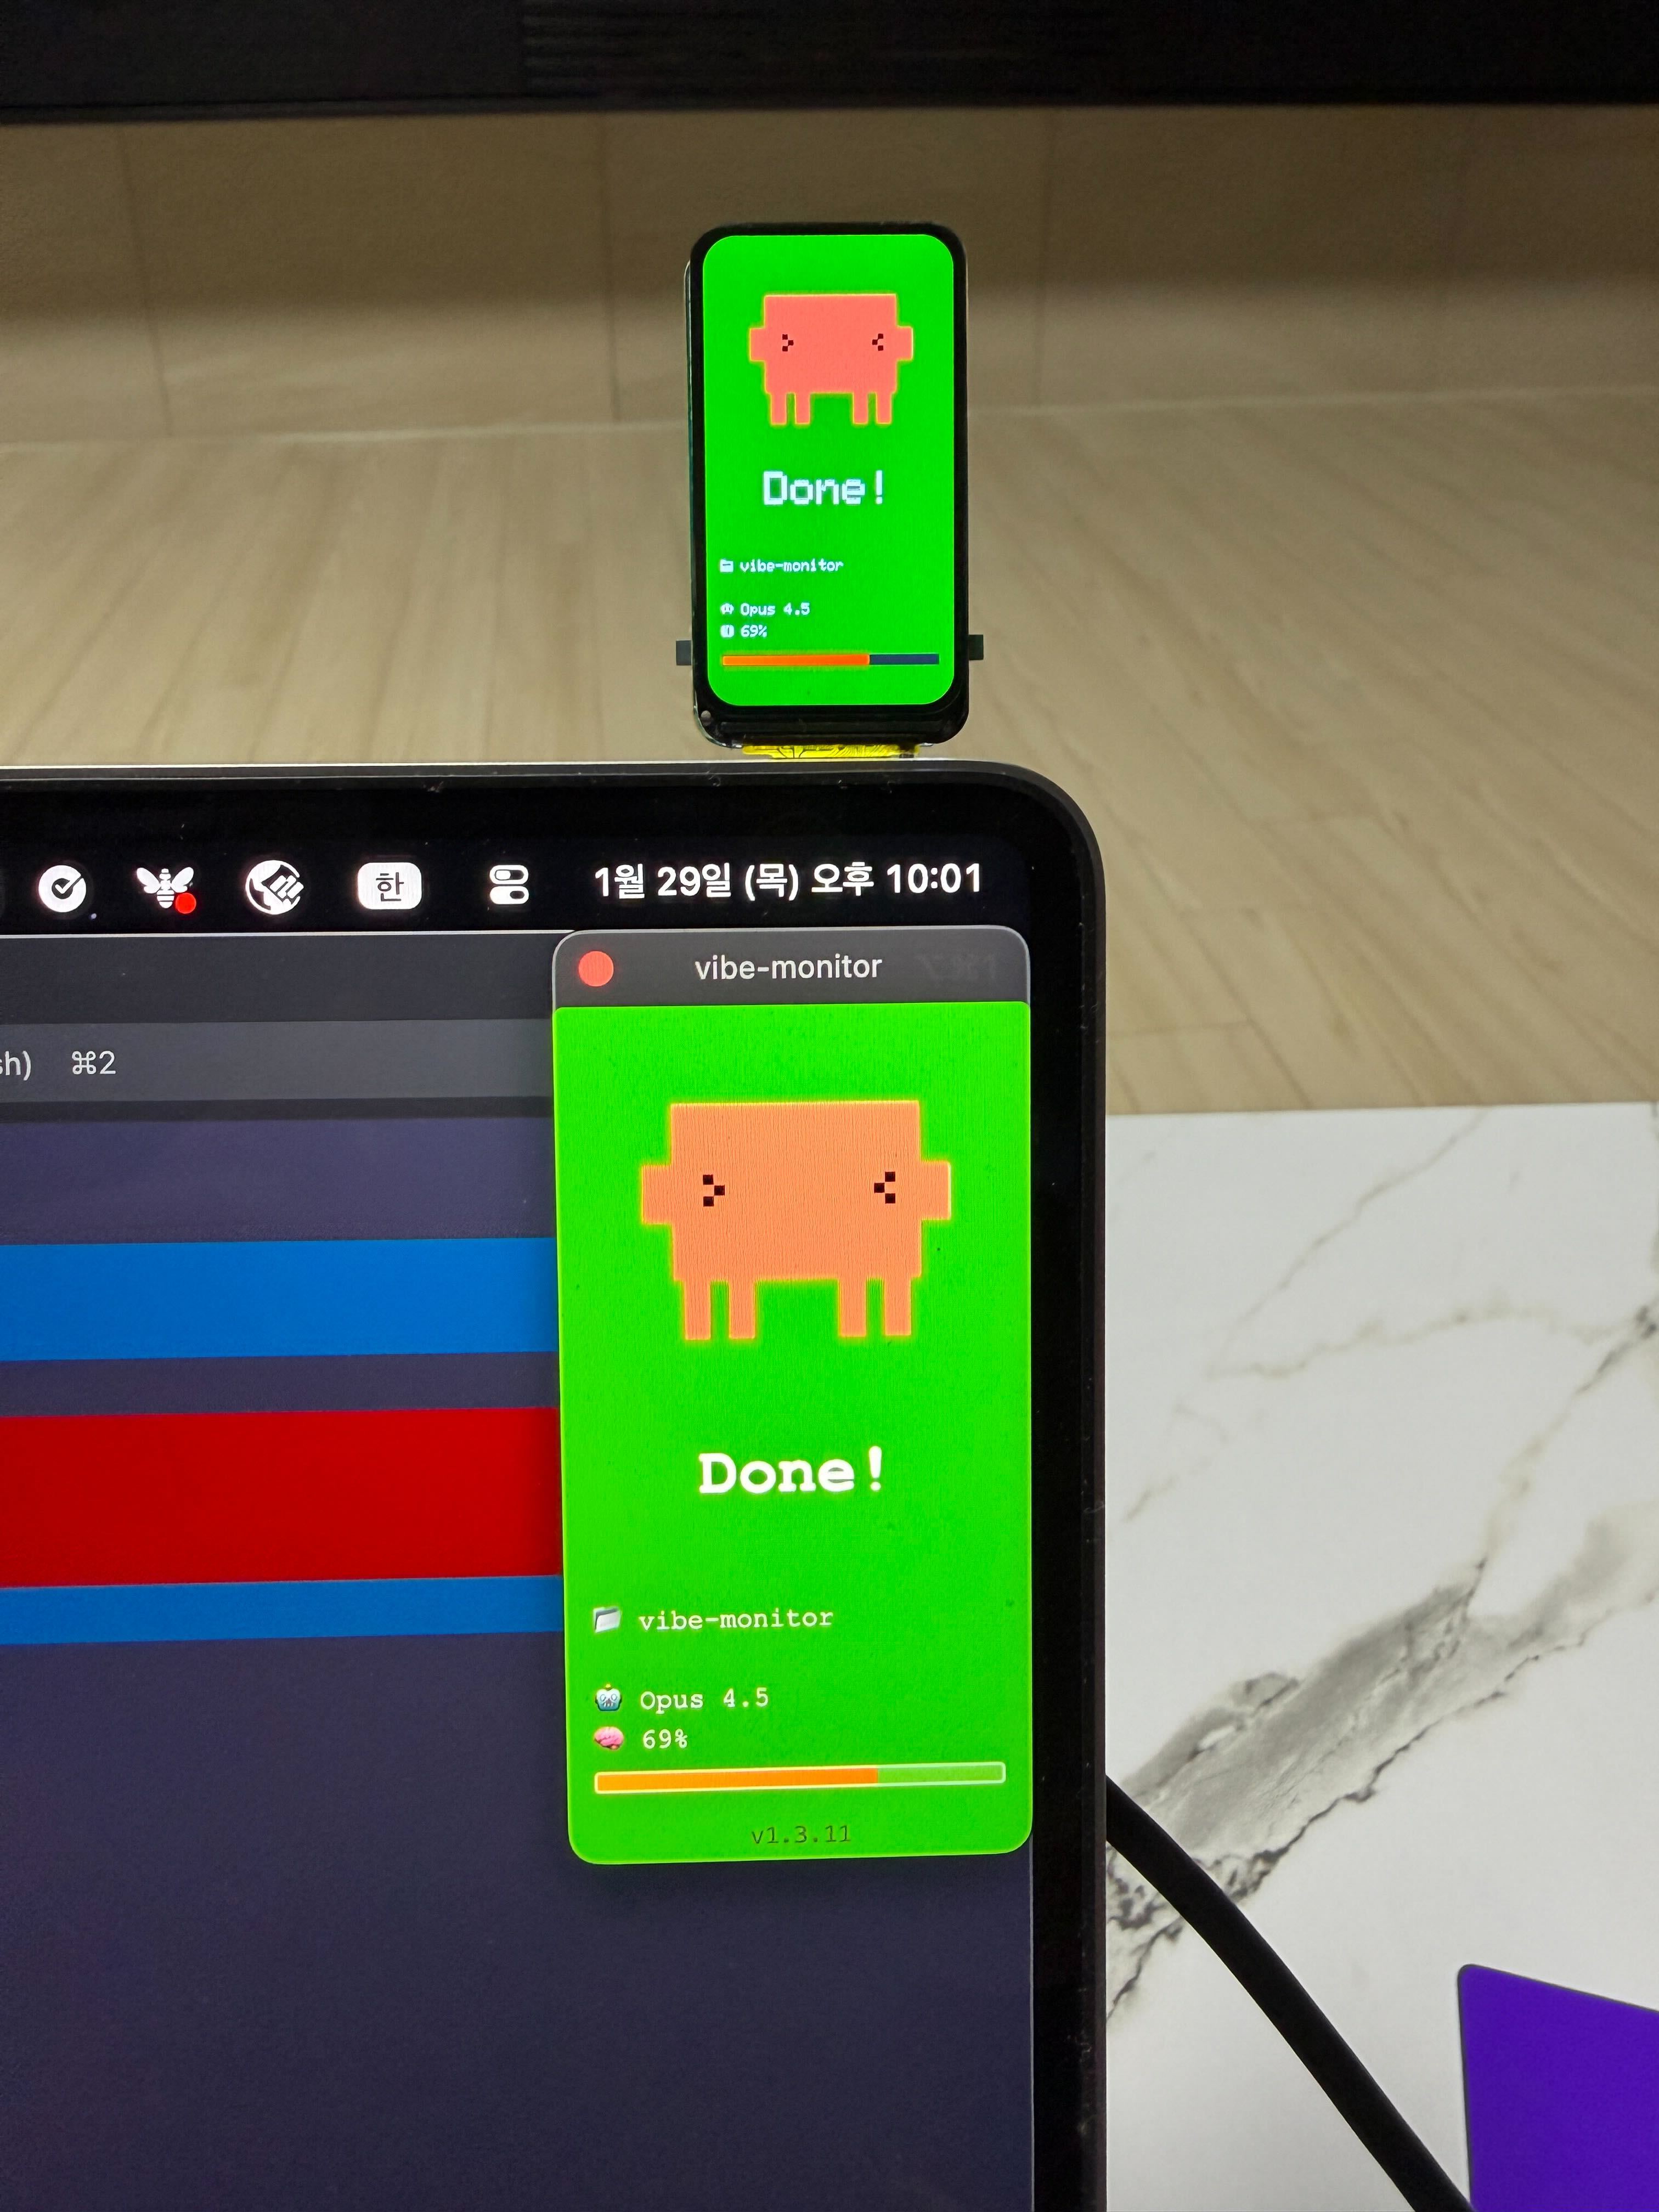
| done | Green | > < | Done! | Tool completed |
| sleep | Navy | ─ ─ + Z | Zzz… | 5min inactive |
2. Working State Text
Different text displayed based on tool:
| Tool | Display Text |
|---|---|
| Bash | Running, Executing, Processing |
| Read | Reading, Scanning, Checking |
| Edit | Editing, Modifying, Fixing |
| Grep | Searching, Finding, Looking |
3. Memory Bar
Context window usage shown as gradient:
- 0-74%: 💚 Green
- 75-89%: 💛 Yellow (warning)
- 90-100%: ❤️ Red (danger!)
4. Click to Focus Terminal
On macOS, clicking the VibeMon window automatically switches to that project’s iTerm2/Ghostty tab! Implemented with AppleScript.
Lessons Learned
-
Single Table Design is truly efficient. Could handle diverse queries with PK/SK combinations in DynamoDB.
-
WebSocket + API Gateway combination. Implementing real-time communication serverlessly was more complex than expected.
-
Pixel art is harder than expected. Conveying emotion on a small canvas isn’t easy.
-
Pair programming with AI. Built VibeMon while developing with Claude Code, then used VibeMon to monitor Claude Code. Meta.
Conclusion
VibeMon started from a simple question: “What should I display on this small LCD screen?” Now it’s grown into a project supporting ESP32 hardware, Desktop app, and web dashboard.
Next goals:
- Support more AI tools (Cursor, Windsurf, etc.)
- Team features (multiple users’ status on one screen)
- ESP32 custom case design (3D printing)
Having a cute pixel character accompany me while coding makes it feel less lonely.
Thank You
This project was built with AI. Pair programming with Claude Code, monitoring Claude Code with VibeMon, and feeding that experience back into VibeMon — it was a fun recursive loop.
Thanks for reading this long post. Please try VibeMon, and feedback or contributions are always welcome!
Links:
- Dashboard: vibemon.io
- Desktop App: npm - vibemon
- GitHub: nalbam/vibemon, nalbam/vibemon-app